- Clothing, Shoes, Jewelry & Watches
- Home, Garden, Outdoor & Pets
- Electronics
- Audio, Video & Portable Devices
- Cables
- Adapters & Gender Changers
- Headsets, Speakers & Soundcards
- Power Protection
- 3D Printing
- Video Cards & Video Devices
- Tools & Components
- Sound Cards
- Alternative Energy
- Barebone / Mini Computers
- SSDs
- Accessories
- Mobile Accessories
- Storage Devices
- Personal Care
- Healthcare
- Home Theatre Systems
- Laptops, Computers & Office
- Speakers & Audio Systems
- Tech Services & Support
- Projectors, TVs & Home Theater
- Wi-Fi & Networking
- Cell Phones
- Electronics Deals
- Headphones
- Tablets & E-Readers
- Digital Cameras
- Home Phones
- Tech Accessories
- Electronics Sanitizing & Cleaning Supplies
- Smart Home
- Batteries, Power Banks & Chargers
- Wearable Technology
- GPS & Navigation
- Movies, Music, Books & Games
- Luggage
- Bible Covers
- Briefcases
- Camo
- Coolers
- Toiletry Bags
- Tote Bags
- Backpacks
- Carry-on Luggage
- Checked Luggage
- Lunch Bags
- Travel Accessories
- Luggage Deals
- Laptop Bags & Briefcases
- Kids' Luggage
- Duffels & Gym Bags
- Suitcases
- RFID Blocking Luggage & Travel Accessories
- Luggage Sets
- Mens' Luggage
- Handbags
- Accessories
- Outdoor
- Beauty Luggage
- Travel Totes
- Garment Bags
- Weekenders
- Messenger Bags
- Beauty & Health
- Category List
- Clothing, Shoes, Jewelry & Watches
- Home, Garden, Outdoor & Pets
- Electronics
- Audio, Video & Portable Devices
- Cables
- Adapters & Gender Changers
- Headsets, Speakers & Soundcards
- Power Protection
- 3D Printing
- Video Cards & Video Devices
- Tools & Components
- Sound Cards
- Alternative Energy
- Barebone / Mini Computers
- SSDs
- Accessories
- Mobile Accessories
- Storage Devices
- Personal Care
- Healthcare
- Home Theatre Systems
- Laptops, Computers & Office
- Speakers & Audio Systems
- Tech Services & Support
- Projectors, TVs & Home Theater
- Wi-Fi & Networking
- Cell Phones
- Electronics Deals
- Headphones
- Tablets & E-Readers
- Digital Cameras
- Home Phones
- Tech Accessories
- Electronics Sanitizing & Cleaning Supplies
- Smart Home
- Batteries, Power Banks & Chargers
- Wearable Technology
- GPS & Navigation
- Movies, Music, Books & Games
- Luggage
- Bible Covers
- Briefcases
- Camo
- Coolers
- Toiletry Bags
- Tote Bags
- Backpacks
- Carry-on Luggage
- Checked Luggage
- Lunch Bags
- Travel Accessories
- Luggage Deals
- Laptop Bags & Briefcases
- Kids' Luggage
- Duffels & Gym Bags
- Suitcases
- RFID Blocking Luggage & Travel Accessories
- Luggage Sets
- Mens' Luggage
- Handbags
- Accessories
- Outdoor
- Beauty Luggage
- Travel Totes
- Garment Bags
- Weekenders
- Messenger Bags
- Beauty & Health
- Baby & Toys
- Sports & Outdoors
- School & Office Supplies
- Breakroom & Janitorial Supplies
- Diaries
- Utility & Stationary
- Pens & Pencils
- Teacher Supplies & Classroom Decorations
- Paper
- Markers
- Binders
- School Supplies
- Packing & Mailing Supplies
- Tape, Adhesives & Fasteners
- Boards & Easels
- Crayons
- Desk Organization
- Pencils
- Filing & Organizers
- Journals
- Pens
- Labels & Label Makers
- Tools & Equipment
- Calendars
- Sticky Notes
- Notebooks
- Erasers & Correction Tape
- Pencil Cases
- Planners
- Retail Store Supplies
- Highlighters
- Locker Accessories
- Cute School Supplies
- School & Office Accessories
- Food & Grocery
- Shops All
- Unique-Bargains
- Cool cold
- Wesdar
- i-Star
- CoCoCo
- Targus
- Cooling Device Accessories
- Xtrike Me
- Tech/Gaming
- Gift Cards
- Women's Accessories
- Flash
- Men's Clothing
- Gift Ideas
- Brand Experiences
- Sale on Select School & Art Supplies
- Jewelry
- Featured Brands
- Nursing Items
- Storage
- Men's Shoes
- College
- School & Office Supplies
- Bullseye's Playground
- PRIDE
- Women's and Men's Shoes & Accessories
- Holiday Trees, Lights & More Sale
- Women's Dresses
- Gingerbread
- Caregiver Essentials
- Baby Bath
- select School Supplies
- Doorbusters
- Bedding & Bath
- Women's Sandals
- Sandals for the Family
- Men's Accessories
- Shops All
- One-day Easter sale
- select Health Items
- Friendsgiving
- Women's Tops, Shorts & Shoes
- Made By Design Organization
- Baby Mealtime
- For New & Expecting Parents
- Crayola Kids' Daily Deal
- Spritz Party Supplies
- Wellness Icon Glossary
- Our Generation Dolls & Accessories Kids' Daily Deal
- select Home items
- Mas Que
- Baby Apparel
- Children's Board Books Kids' Daily Deal
- Select Office Furniture
- Most-added Wedding Registry Items
Buy Jetson Nano Metal Case/Enclosure for Jetson Nano Developer Kit and B01(A02 & B01) with Camera Holder,Reset and Power Buttons, Support Single or Binocular Camera,Cooling Fan,Wireless-AC8265 in United States - Cartnear.com
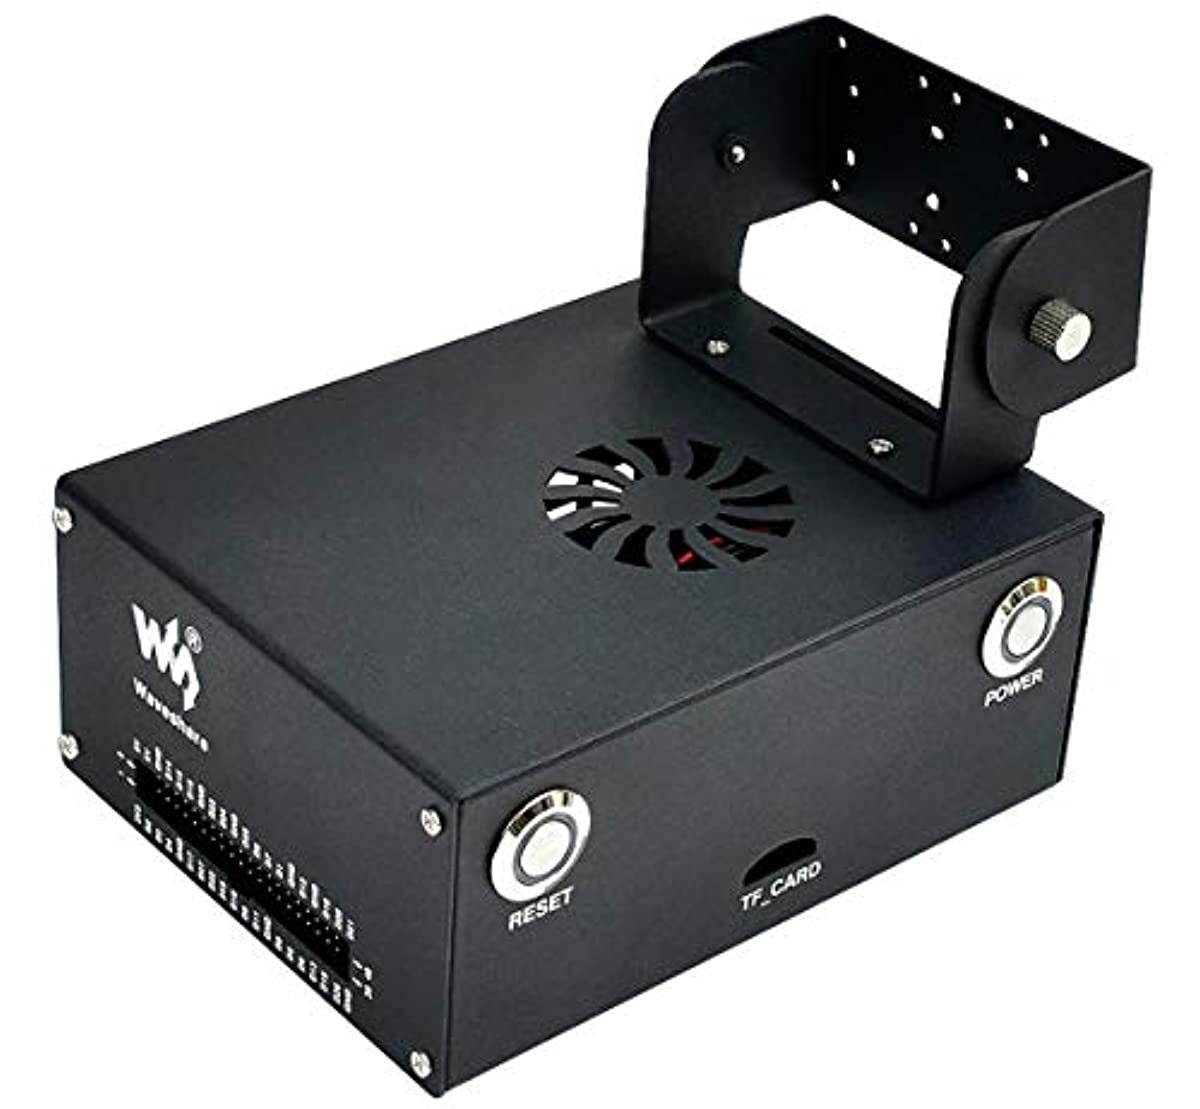
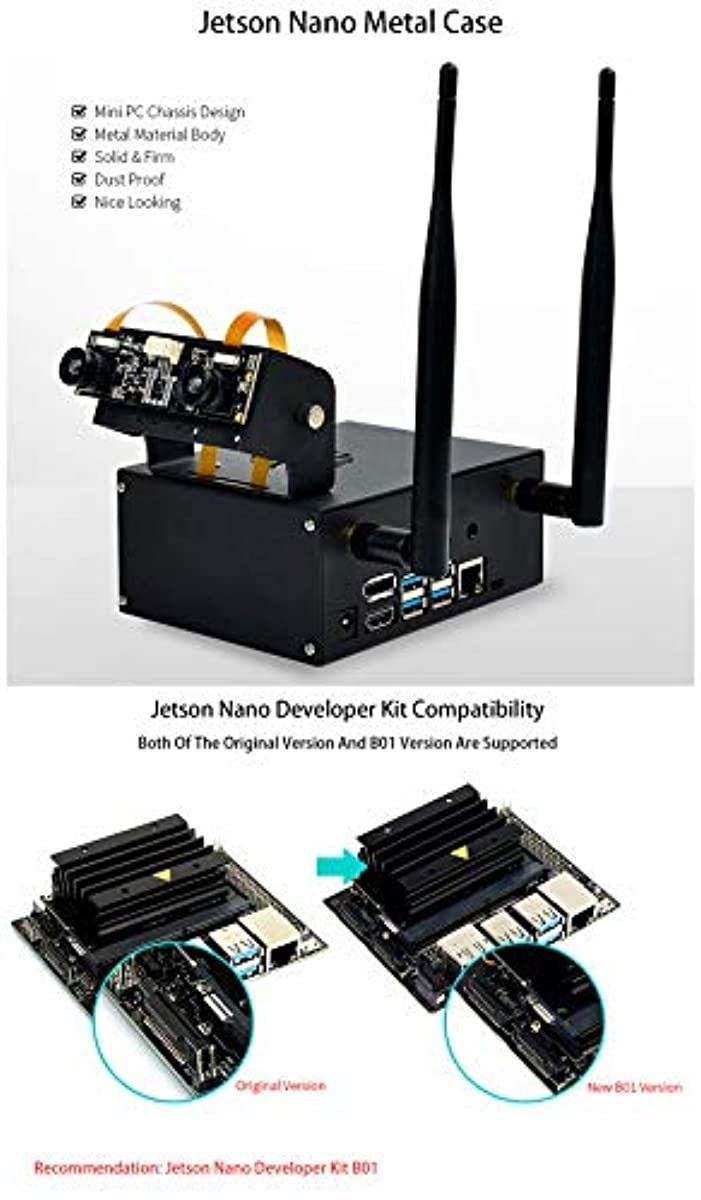
Jetson Nano Metal Case/Enclosure for Jetson Nano Developer Kit and B01(A02 & B01) with Camera Holder,Reset and Power Buttons, Support Single or Binocular Camera,Cooling Fan,Wireless-AC8265
CTNR1499815 CTNR1499815$ 76.26 $ 78.62 3% Off
*Product availability is subject to suppliers inventory
SHIPPING ALL OVER UNITED STATES
100% MONEY BACK GUARANTEE
EASY 30 DAYSRETURNS & REFUNDS
24/7 CUSTOMER SUPPORT
TRUSTED AND SAFE WEBSITE
100% SECURE CHECKOUT
Brand: waveshare
Jetson Nano Metal Case/Enclosure for Jetson Nano Developer Kit and B01(A02 & B01) with Camera HolderReset and Power Buttons Support Single or Binocular CameraCooling FanWireless-AC8265
Color:Jetson Nano Metal Case
Assembly Steps:
Check the components before assembling.
1.Remove the Jetson nano assemble the wireless module and replace it.
2.Mount the buttons on the metal box note that the button with four wires is the Power button and another which has two wires are the Reset button.
3.Connect buttons to Jetson Nano please refer to the diagram. Insert the micro SD adapter board to the Micro SD slot of Jetson nano. Press it to let it locked.
Note that you should press the adapter to make sure that the adapter is pop-up then remove it. You cannot directly pull it out otherwise you will break the Micro SD slot.
4.Adjust the cables mount the Jetson Nano developer Kit in the Metal box and fix it by screws. You should also fix the Micro SD adapter board by screw.
5.Fix the Jetson Nano GPIO adapter board in metal box by skews.
6.Fix the antennas of the wireless module on the metal box. Assemble the cooling fan
7.Connect Jetson nano to the GPIO adapter by cable.
8.Fix the camera holder-bottom on the metal cover.
9.Fix camera on camera holder-top by nylon screws.
10.Assemble camera holders by screws adjust the angle and turn it tightly..
11.Connect the cable cables to Jetson Nano (you can first remove it from cameras) If you have only one camera just need to connect one cable.
12.Assemble the case connect the Camera and antennas.
For more information about Assembly please check in the wiki: https://www.waveshare.com/wiki/Jetson_Nano_Case_(C)?Amazon
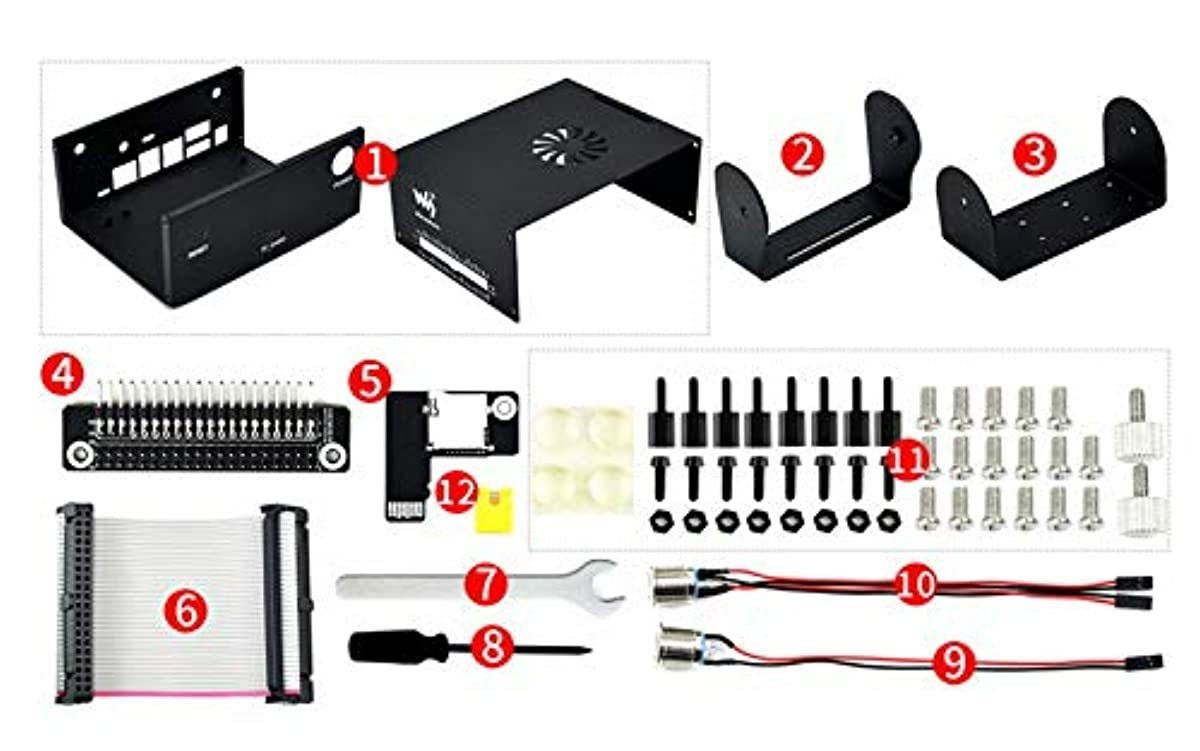
Package Content
1.Body case (top and bottom)
2.Camera holder bottom mount
3.Camera holder top mount
4.Jetson Nano adapter board
5.Micro SD card adapter board
6.Flat ribbon cable 2*20PIN
7.Spanner
8.Screwdriver
9.Button with 2PIN wires
10.Button with 4PIN wires
11.Screws pack
12.Jumper
- Jetson Nano Metal Case is compatible with : Jetson Nano Developer Kit (Both of the original version and B01 version) ( Case only)
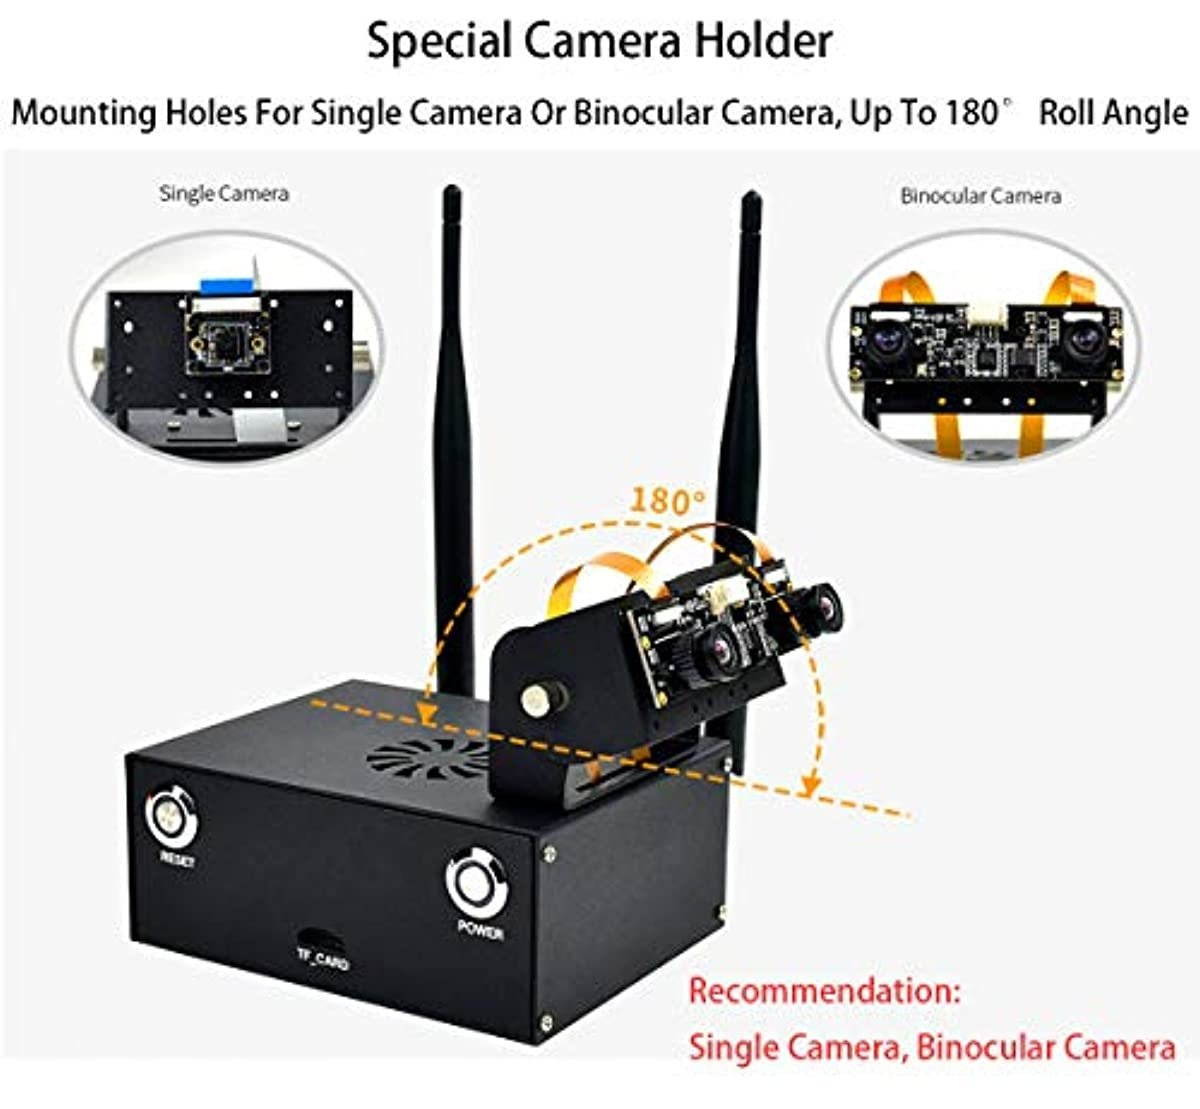
- Special camera holder Mounting holes for single camera or binocular camera up to 180° roll angle. Recommendation: 8MP IMX219 Camera(8MP IMX219-200 Camera8MP IMX219-170 Camera8MP IMX219-120 Camera8MP IMX219-160 Camera8MP IMX219-77 Camera). IMX219-83 Stereo Binocular Camera.
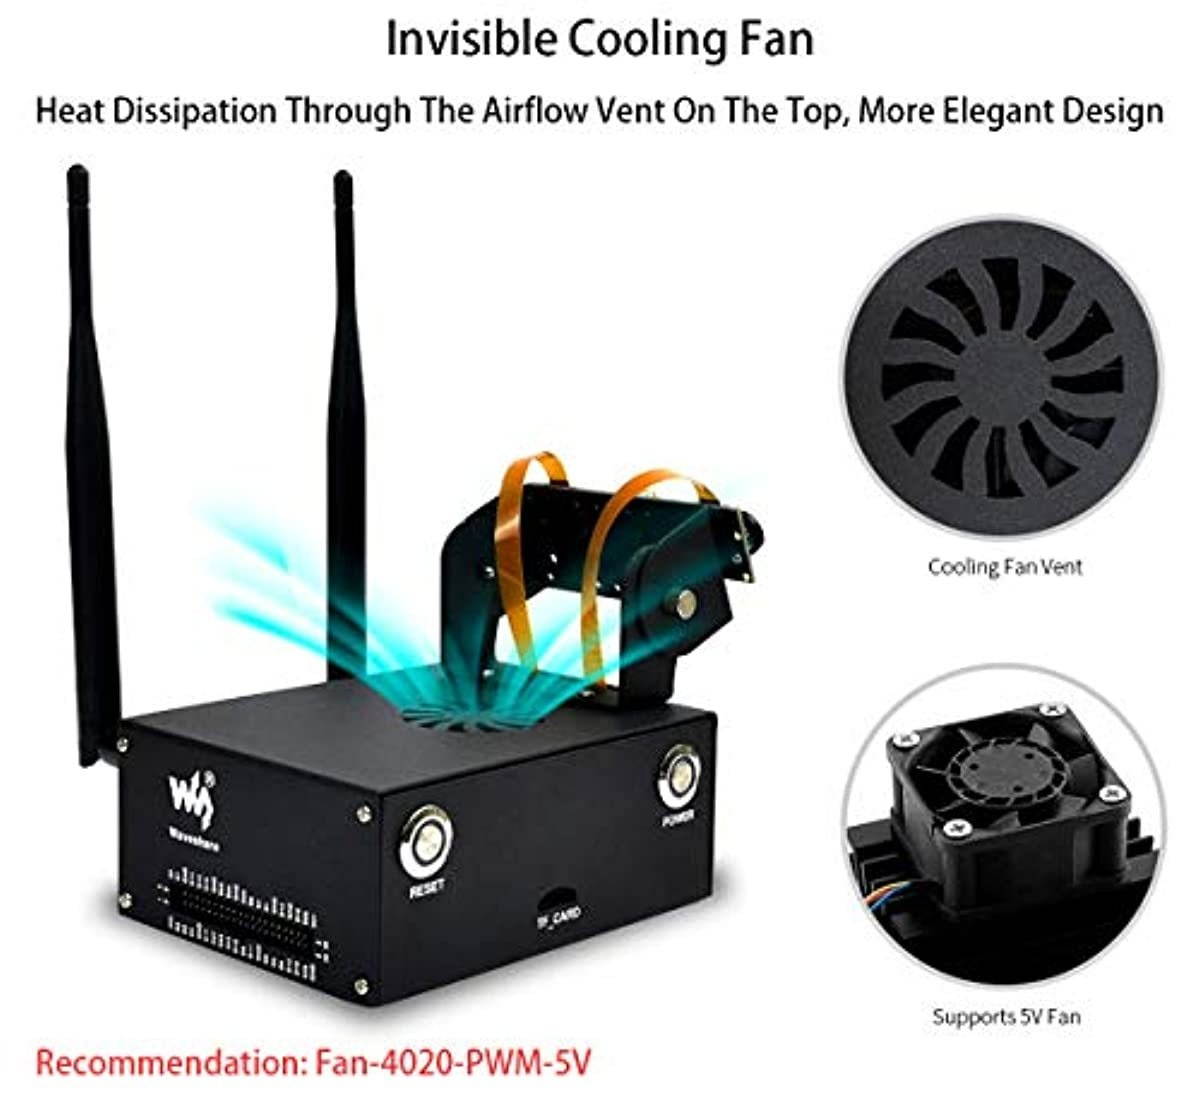
- Internal Fan Design Heat dissipation through the airflow vent on the top more elegant design.Recommendation: Fan-4020-PWM-5V
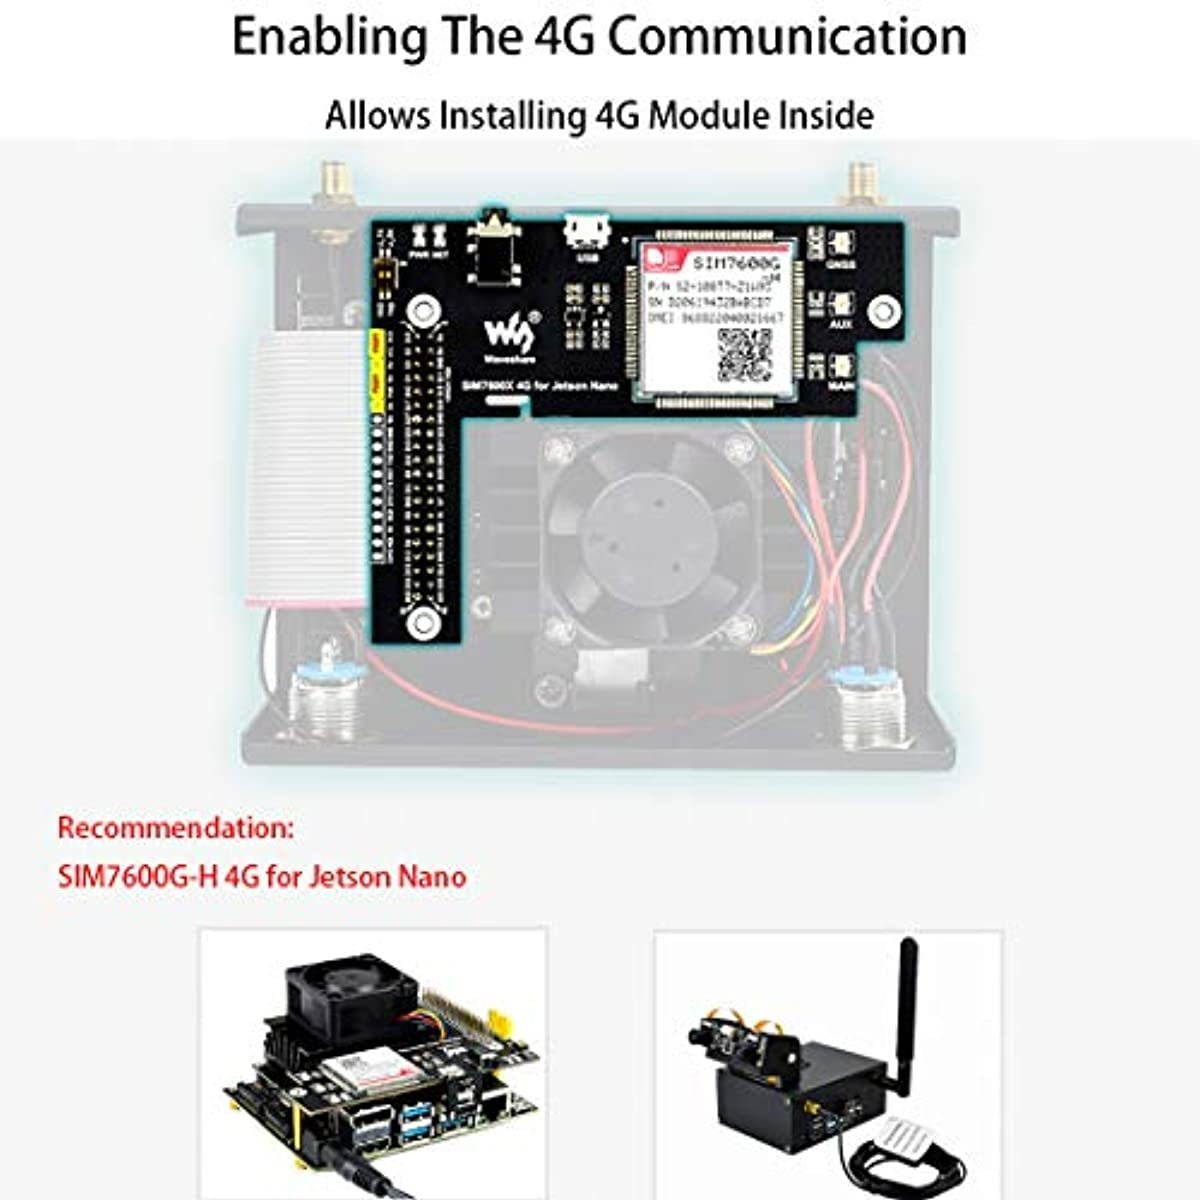
- RESET and POWER buttons with system status indicator (B01 only NOT available for the original version).
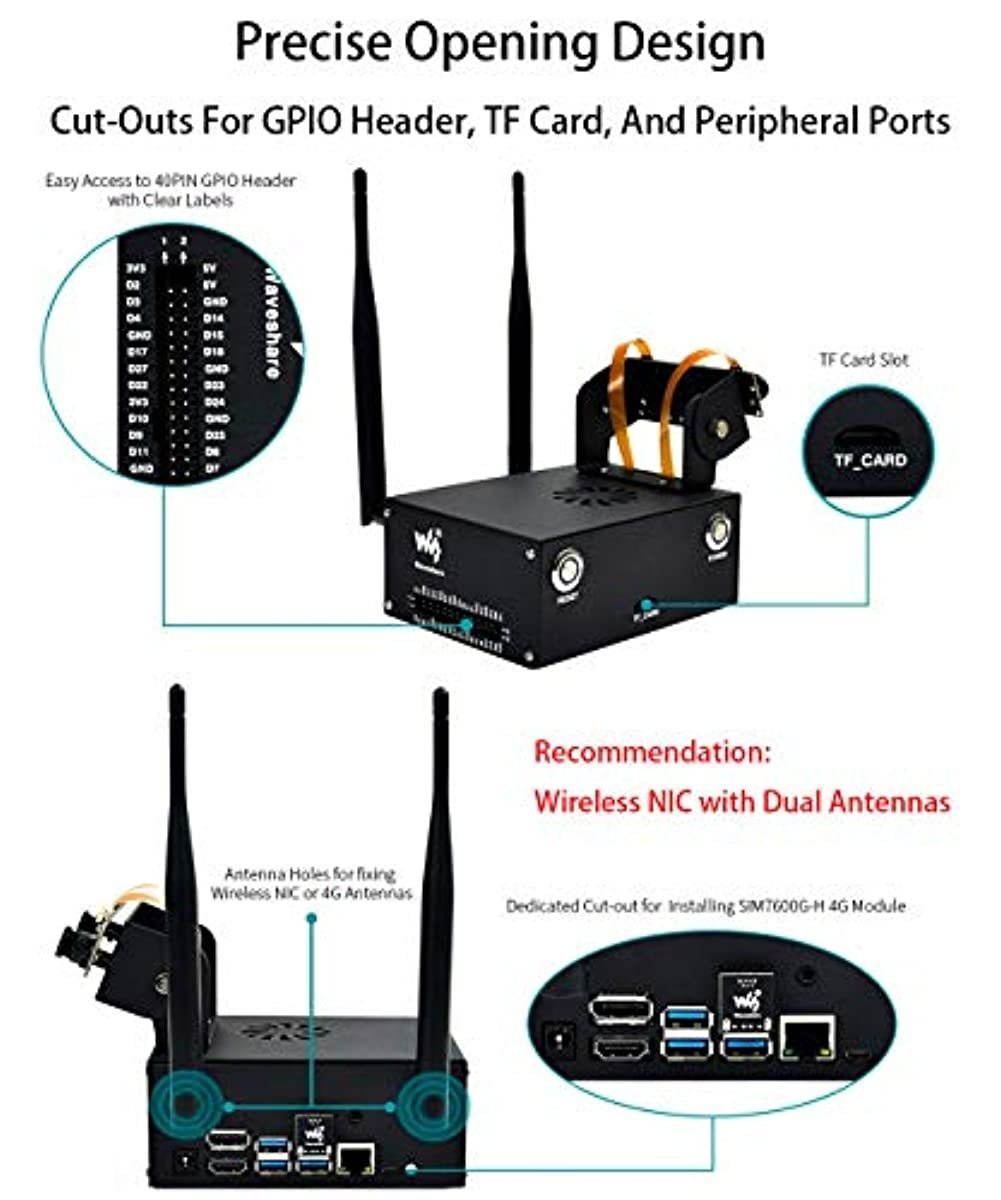
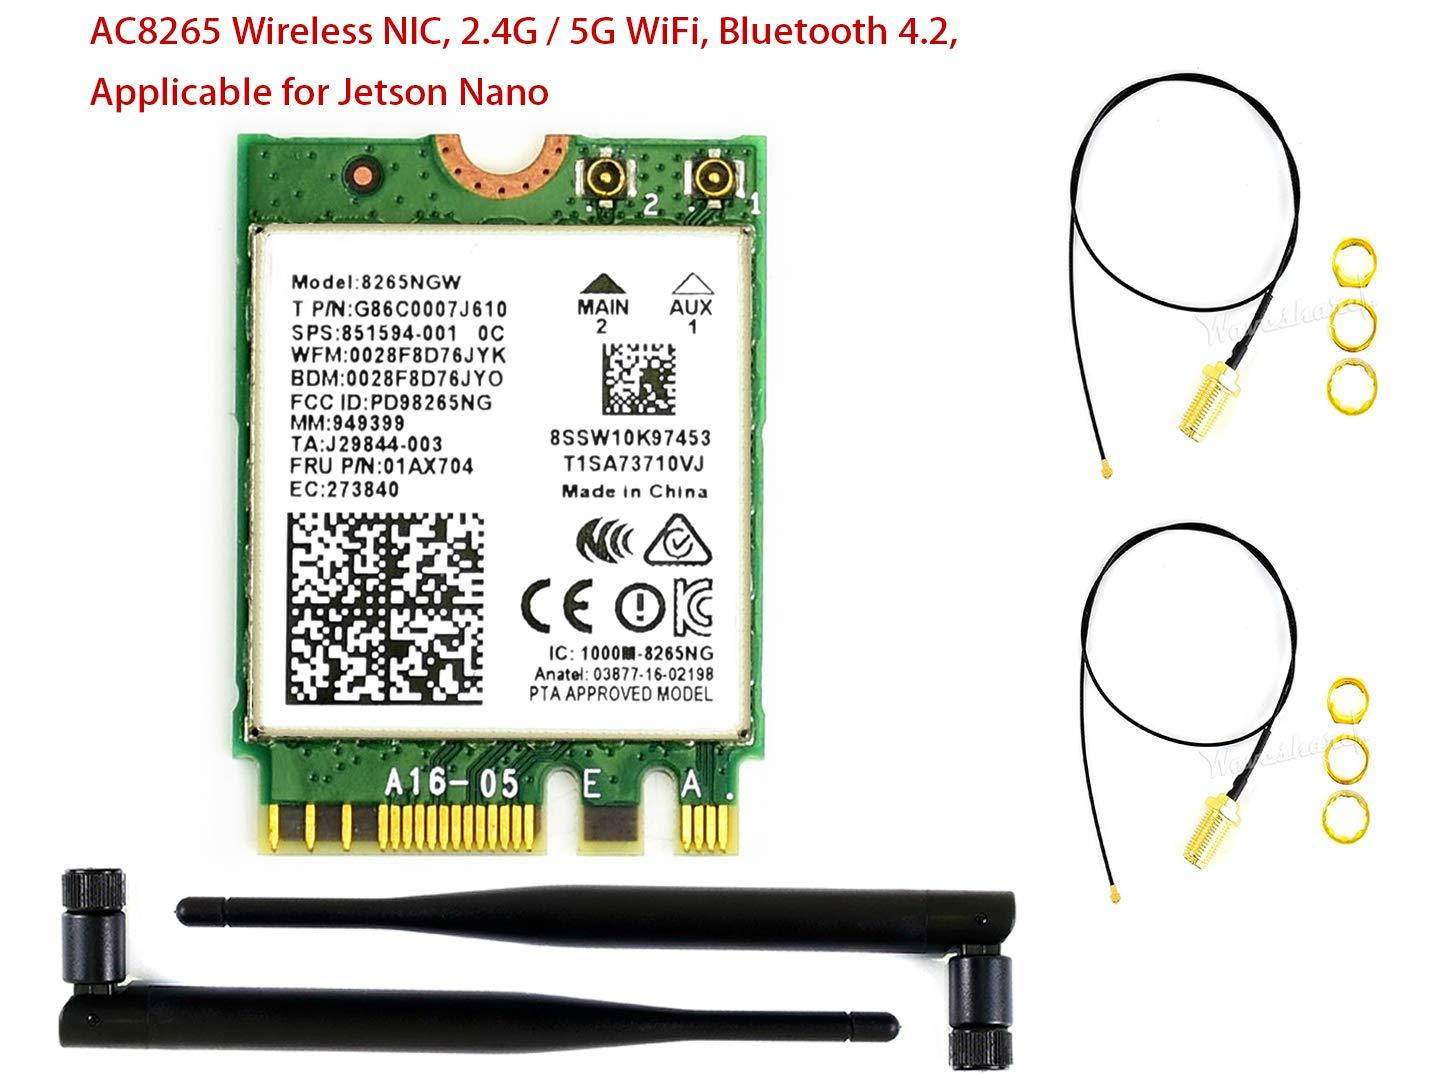
- Allows installing 4G module inside Recommendation: SIM7600G-H 4G for Jetson Nano. Precise opening design: Cut-outs for GPIO header TF card and peripheral ports Recommendation: Wireless-AC8265

